Miscellaneous Projects
This was my first attempt at building an amplifier, or anything even remotely similar. Before building this, I built an Adire Tempest-based subwoofer, but it was not nearly as sophisticated or as time-consuming as this. After blowing up somewhere around 15 perfectly matched irfp-240s, I finally have a functional and stable amplifier which sounds amazing, especially compared to the Technics receiver that I was using previously.
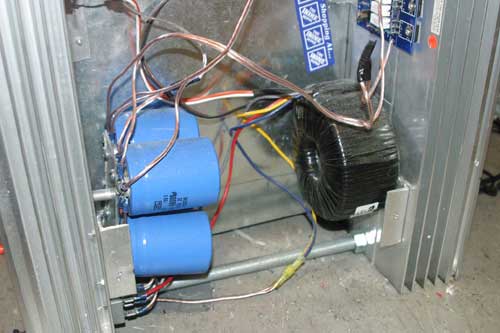
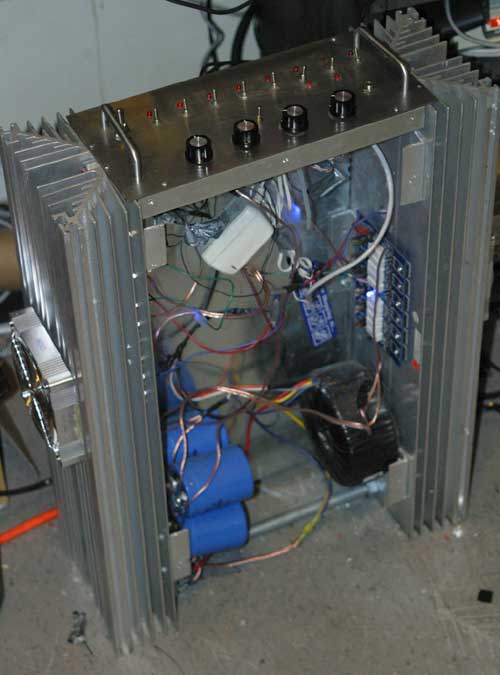
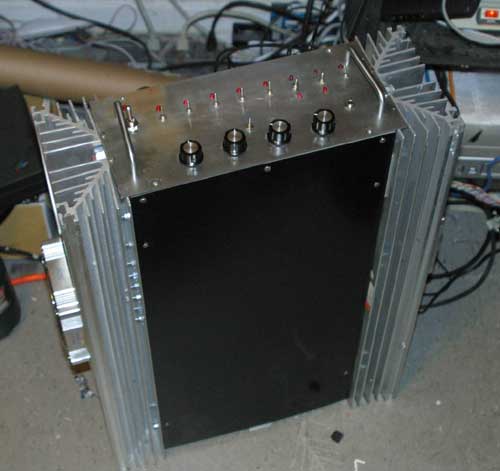
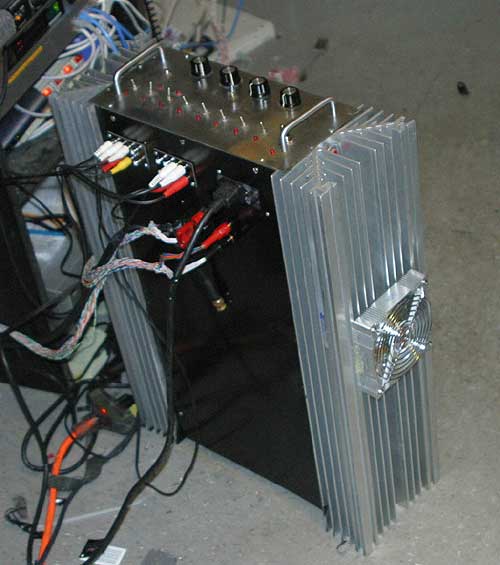
I started this project knowing that I would be going off to college soon after completing it. The prospect of moving from my relatively large bedroom to a cramped dorm room caused me to keep one word in mind while I was building this: consolidation. This amp had to be one single durable unit that could easily moved and that could fit almost anywhere. To accomplish this, I used the large and sturdy aluminum heat sinks as a major structural component of the box. Fastening the heat sinks together with two 5/8" threaded rods provided a sturdy backbone and allowed everything to be simply built up around them. The caps and transformer for the power supply (both somewhat heavy) could be easily attached to the heat sinks, as could the top control panel and the 1/32" thick pieces for the front and the back.
The power supply was constructed using a Plitron 750va, 2x115v primary, 2x30v secondary toroid transformer and 4 68,000uf (supposedly 68,000uf -- but I kind of doubt that considering their size) electrolytic capacitors from BG Micro. With my house current, I get somewhere around ± 35 VDC.
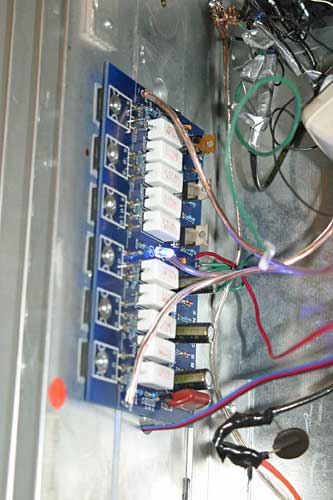
The amplifier circuit itself was done using Kristijan Kljucaric's PCBs, which made things comparatively easy (If pass labs had put out a5 pcbs themselves, I would have bought them out of respect for Pass' copyright, but these were the only ones available). These PCBS are laid out logically, they are very high quality and they also come with a helpful set of tips on mounting the fets and on which parts to use. I highly recommend them if you don't want to go through the effort of designing your own PCBs and having them manufactured. Two PCBs are available here for 49 euros shipped (thanks to Bush, current exchange rates put that at a little over $60). Even though they were shipped all the way from Croatia, they arrived quickly and in excellent condition.
Now, back to the whole concept of practicality and consolidation, I had to add some switches and pots that most DIY projects like this try to avoid. I fully recognize that I need a preamp, but right now this series of switches, pots and two rotary selectors works out rather well. As soon as I get around to it, I'm going to build a BOSOZ and try and actually fit it inside some of the empty space inside the case. Admittedly, the wiring is a little messy, but it works quite well and introduces no noise to the amp.
Also, a lot of people do ask me "what do all of those buttons do." I have assured them and I assure you now....they all do something. Two are for the highpass filter, two are for turning each channel on or off, two are for selecting between sending the input to the amp or to the headphone jack, one is for the subwoffer output and one is for the fans (I'll talk about them later).
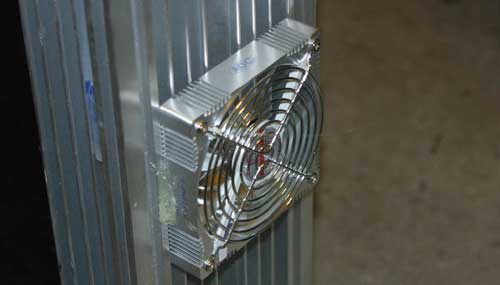
I decided to add fans to the case after I realized just how much heat this thing generated. It hurt to touch the heat sinks, and I estimate that the area close to the fets was reaching 90 degrees C. While it could operate indefinitely at this heat, I decided that it would be best if I added some fans so that I didn't burn myself when I ran into it. I was also concerned about whether the paint I was going to use on some of the case could withstand the heat. I decided to add 2 aluminum 120mm computer case fans--one for each channel. These fans normally operate at 12v and move about 80cfm each. However, there was some noise from the fans when they were turned on, so I decided to run them in series on one 12v power supply. I have enough airflow to keep the heat sinks cool, and the fans generate almost no audible noise.
So, that pretty much covers it. Here are the pictures of the outside of the completed amp:
And, I have to acknowledge the major, gigantic amount of assistance that I received from my good friend Mike Price. He moved me from the almost constant destruction of expensive mosfets to the stable amplifier that I have now. He also was the one who originally convinced me to undertake this project.
Also, thank you Nelson Pass. You have such a wonderful view of your intellectual property, and the entire DIY community and I are grateful for your contribution.
Elliott Wolf,
.(JavaScript must be enabled to view this email address)