Zen Amplifier Revisited
Intro
-"What is the sound of one transistor clapping?"
-"Wonderful !"
When I saw the Zen Revisited schematics for the first time I said to myself: "This is it!". Almost a year later the amp was completed and working. I can only join to the rest of the DIY crew and express all my admiration to Mr. Pass’s efforts.
Zen Revisited
Although I have a degree in electronics I consider myself a bit more of a constructor then an electrician. I don’t even force myself to understand all electrical circuit nuances, except what is good to know. My DIY philosophy is: Here is the schematics. Do it!
I followed the Zen Rev article to the letter and the amp worked first time powered on. OK, I admit, the degree helped, since this was my first bigger project. Some small caps round the power supply were the only added elements. Yes, I could change some things, but why be smarter then Mr. Nelson. I am telling this to the DIYers who were having or have problems with this project. Just follow the article and if you don’t make any mistake the amp has to work. No doubt about it!
Construction
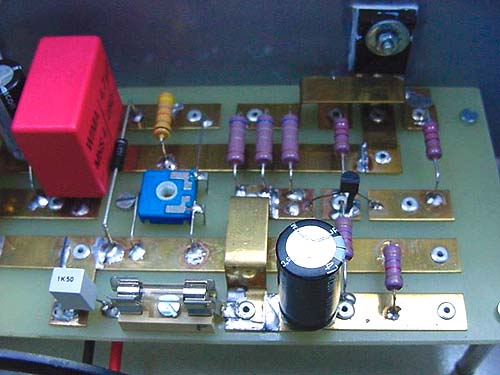
I am sure you are wondering why the hack I didn’t use already designed PCBs from the article. I really don’t now. A lot of hi-fi audio gear is designed an constructed in a way that is not nice just for the ear but also for the eye. Maybe this is the reason that I spent a couple of hours more on ‘interior’ design.
At the end I was pleasantly surprised, because ‘nice looking’ construction led me toward better technical solutions: no rats nest, short wires, optimal grounding point and symmetry. No need to mention that the amp is absolutely hum free and very stable.
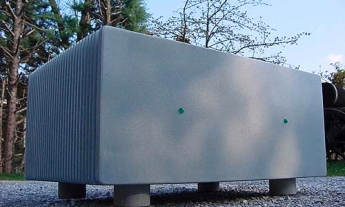
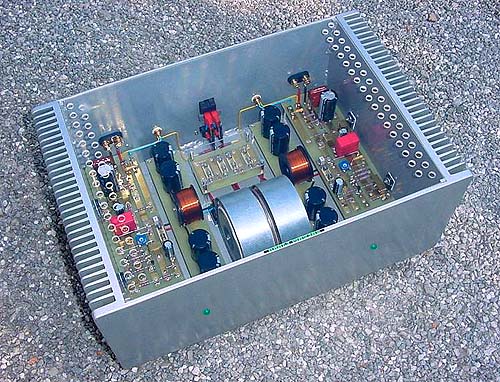
Picture1: The Al box is made of front, rear and bottom plate. The sides are two 20x30 cm Al heatsinks. All parts are soldered together and painted with car paint. Four legs are made from marble.
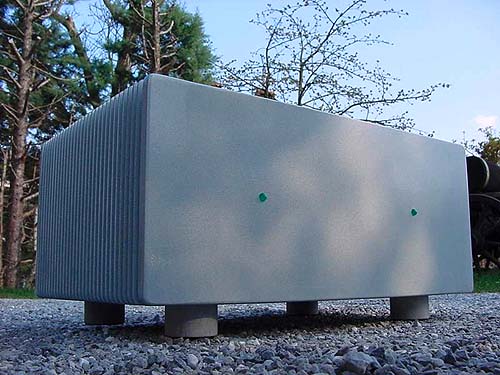
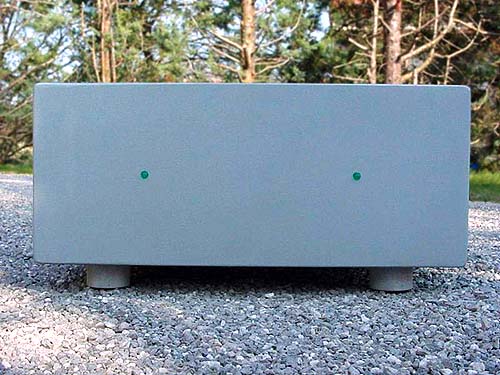
Picture2: Front view.
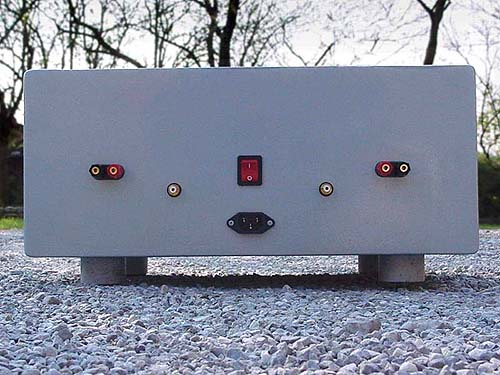
Picture3: Rear view.
Picture4: Top view with mounted 4mm plexiglass top cover.
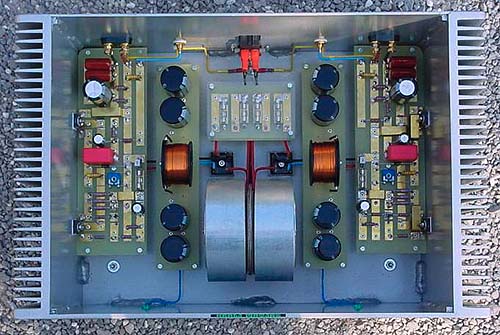
Picture5: Top view. Plexigass removed. Hidden under both channels is a relay switch circuitry which prevents turn-on bump in the speakers when turning on the amp.
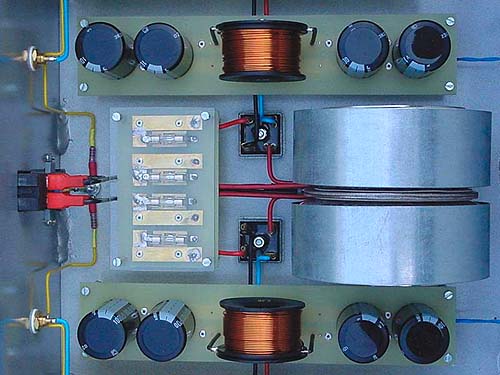
Picture6: Power supply. Both toroidal transformers are wound with magnetic tin to minimize magnetic field dissipation.
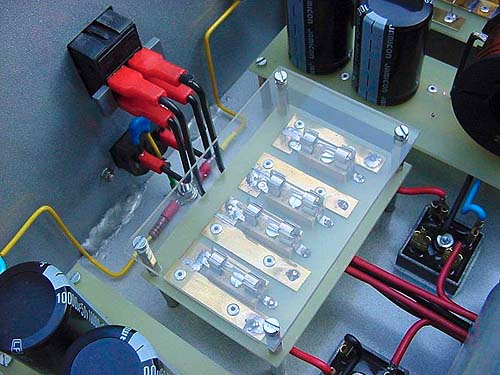
Picture7: Power supply detail. AC plug, switch and four fuses. Two for primaries and two for secondaries.
Picture8: In/Out detail with output caps.
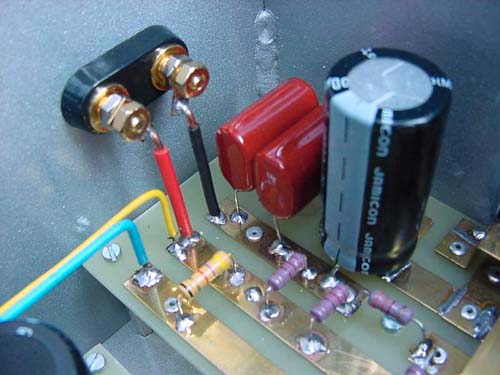
Picture9: Left channel current source. All elements are fitted on 1cm brass tapes. Plates for left and right cannel are slightly different.
So, this is it. Next bus stop: Aleph…maybe…
Conclusion
Zen and other amps of its kind caught my attention years ago. In spite all simplicity they sound very mature. There are sure many amps which sound better, but in the field of simplicity/performance - or should I say cost/performance - Zen is sure one fellow hard to beat.
At this point I could start a philosophical essay what ‘sound better’ stands for, but I won’t.
With an unlimited budget you can construct, or even simpler, buy, a state of the art piece of hi-fi equipment. But obtaining a very good sounding amp just with few parts and for very reasonable money is a real masterpiece. Here is Mr. Pass another fellow hard to beat.
At the end I would just like to point out one thing that can happen to overenthusiastic DIYers or audiophiles and bothers me very much: they begin to listen to their hi-fi gear instead of music. I’ve seen this and it’s not good. Just as advertisement.
Enjoy the music!
Regards
Matjaz Gerzeli
Europe, Slovenia, 12.04.2002
PS: If you have any questions, don’t hesitate to contact me, and I’ll be very glad to answer.
.(JavaScript must be enabled to view this email address)