Son of Zen
The Son of Zen (SoZ) was my very 1st DIY project in home audio and a complete success. My original plan for building the full 50 watt per channel SoZ proved to be very costly so I settled on building one at half the wattage.
SPECIFICATIONS:
Rated Output: 25 watts x 2 @ 230VAC transformer input Power Supply: 2000 VA Toroidal transformer 224,000 uF total capacitance (112,000uF per rail) 2mH Inductor Silicon: IRFP-240 Hexfets Dimension: 275mm x 450mm x 630mm (11" x 18" x 25") - H x W x L Weight: over 70 Kg (150 lbs)
The hardest and most time consuming part was the drilling and tap threading of the heatsinks and chassis. You could say I've made countless trips to the local hardware store buying replacements. Next most difficult was the construction of the capacitor supply rails where I used a solid copper plate rail where the center tap attaches.
Overall the amp was closely made following Pass's schematics. No additional perks such as short circuit and static protections were used. The only addition I made was adding a thermistor to reduce the effects of power turn on surge (which does a very good job). For wiring I could not justify the cost of exotic cables so I used a mixture of solid core main lines and thick multi-strand OFC wires, all soldered using 60/40 tin/lead. For the resistors I used 50 watt 5% wirewounds in series configuration (5 + 1.5 + 1.5ohms) and 25 watt 5% 1ohm for the other resistors.
I had to wire the amp singled ended as there seems to be a lack of balance line units where I am (and of reasonable price). Sometime next year I hope to convert it to balance line as soon as I find a matching cd player and pre-amp.
SOUND
In short, may well be the only amp I will ever need. For more details on this project and how it sounded please visit my website at:
http://www.geocities.com/super_bq/HiFi.html
PICTURES & COMMENTS
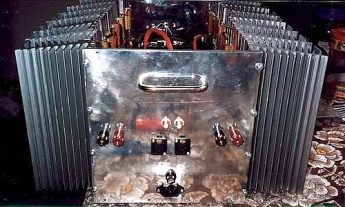
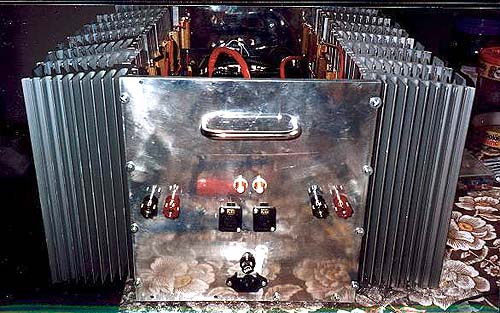
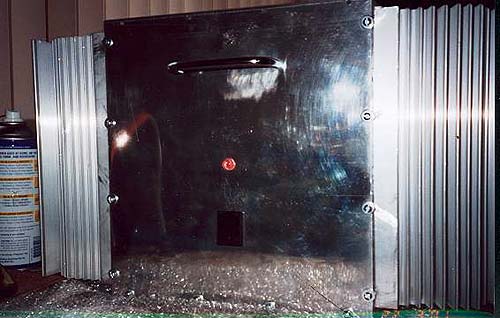
Fig1: Back Connectors - Spent hours polishing the aluminum plates. Dig that handle bar.
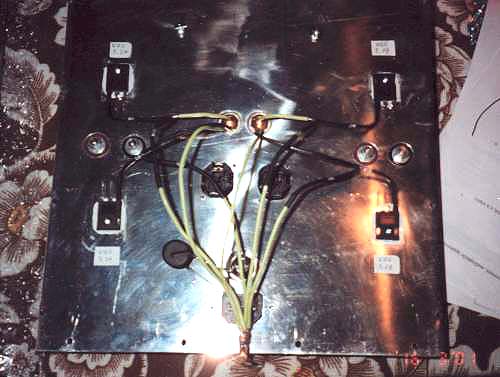
Fig2: Back Plate Hexfet - I've tried to mount the hexfets as close as possible to the speaker terminals. Had problems finding TO-247 size mica so I used larger TO-264. They left quite a mess as the heatsink compound had squeezed out. Lower left you can see the big black round thermistor used for power turn surge control (quite effective). All the green wire leads are star grounded.
Fig3: Back Variac - The Variac I used to test my SoZ, it's rated 0 - 260VAC @ 10 amp
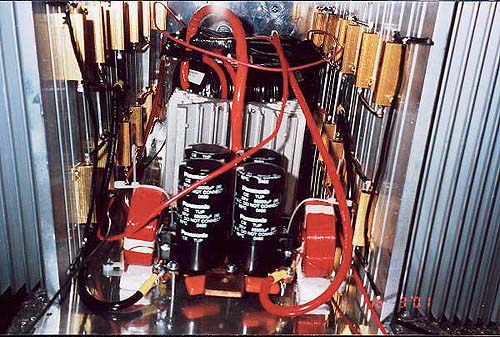
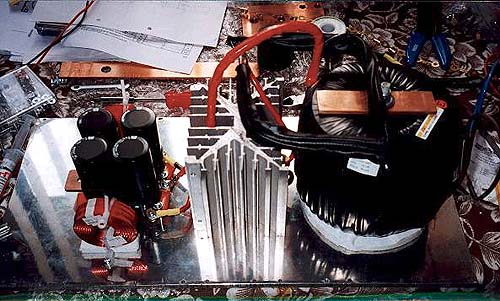
Fig4: Front Inside Cap - 4 main caps each 56,000uF @ 35V. The orange caps are 4.7uf 100V (shunted). The 2mH coils makes it look like a 4x4 truck. Wirewound resisters nicely attached to each heatsink (kind of an overkill).
Fig5: Front Plate LED - Power switch and a 10mm size LED
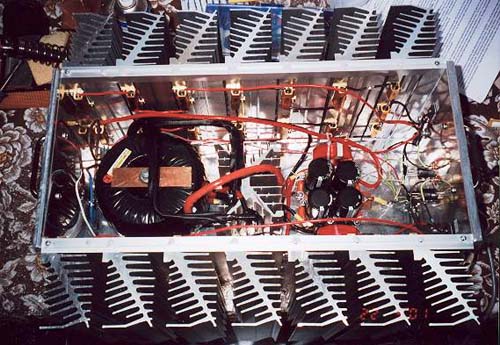
Fig6: Inside - top view with complete wiring. The heatsink in the middle is for the bridge rectifier (rated 400V @ 35amps).
Fig7: Layout - The custom made toroidal transformer was built taller and skinny rather than the usual off the shelf flat and wide ones. The size of the secondary wires coming from the transformer are simply huge and was not easy to bend them by hand. The toroidal is rated 2 KVA 32Vac output @ 230Vac input. I estimate the weight of the toroidal to be 18kg (about 40 lbs).
Fig8: Top Plexiglas Cover - top view with a strip of right angled aluminum to align each side of the heatsinks. Top cover is a 10mm thick Plexiglas with countersunk holes.
Two thumbs up for Mr. Pass and I totally agree that simplicity is best!
Brendon Lee
s